Thursday, March 31, 2011

Daily Declutter Challenge #42 - Thinning out the Bookshelf

OK, so I'll be honest - I haven't been decluttering EVERY day now, but it's a good thing because spring has tentatively arrived on the West Coast.

However, a viral croup has also arrived for my little one, so I had to cancel appointments yesterday & today (renal for her, orthodontics for her sister) and spend lots of time inside, giving nebulizing treatments, watching shows, and generally laying low with Little Miss Wheezy.

Lots of time inside means that there was bound to be a Declutter waiting for me....


Oh, it's hard to declutter books, isn't it?  But when books are starting to get stacked in front of books then either you get another bookshelf (no thanks - there's really not much room for another piece of furniture!) or downsize.

I realized that just because I LIKED that book, and enjoyed reading it in the past, it didn't mean I had to hang on to it.  I came at it with the attitude that there were plenty of other great books out there waiting to be discovered!  And I really like to utilize the local library - they've got the storage space for waaaay more books than I do!

Sometimes decluttering can get pretty messy...


Especially cluttered was the top of the bookshelf - all the cards from my kids and husband were jammed into a couple boxes and were starting to pile up on top.

I found a sturdy, cardboard box that fit these papers and cards nicely, but it wasn't that pretty.

I had some pretty paper left over from Bulliten Board Makeover so I decided to give the box a quick makeover.


Keepin' it real....I didn't have enough paper to cover the whole box.  Ah, well - no one will see the backside!


I managed to clear an entire shelf of books, so I was able to move the bins of cards onto their very own spot, and placed my sewing kit on the top shelf, away from little hands that tend to get into it!


P.S.  The little Raggedy Anne is a piggy bank I received from my grandparents when I was 3 years old, and the "well loved" Hollie Hobby Doll was my first dolly from my mom.  They are very sweet up there!

Tuesday, March 29, 2011

I Tried It - Homemade Liquid Hand Soap

The other day I decluttered in my bathroom cupboards and found lots of  slivers of of half used soaps and little, wrapped hotel soaps.  We prefer using the liquid hand soaps as they are much less messy and easier for kids to use.  I had recently run out of a giant 4 Litre container of hand soap, so I figured this was a great opportunity to try making my own.

There seems to be a shortage of detailed liquid soap recipes on the web for me to follow.  I'm thinking soap-making is a rather imprecise science!  Especially when you're dealing with someone like me, who isn't very precise to begin with...

I grated up all those little soaps with my cheese grater.  This was super easy, and took just a couple minutes.  I ended up with quite a lot of soap!  I guessed it was about 16 oz (2 cups).  I filled a pot with about 8 cups of water and brought to a boil.


I stirred in the soap flakes and turned it down to a very low boil and continued to stir until the soap was totally blended.  I added a teaspoon of glycerin and a couple tablespoons of my Homemade Orange Oil and then turned the heat off and removed the pot from the burner.


Hmmmm....seemed pretty watery, but all the "recipes" I found said to let it sit and it would thicken.  I made the mistake of pouring it into the repurposed 4 L soap container and and left it with the lid off overnight.

When I came back the next morning it had turned into one solid, squishy mass in the bottle.  Ooops!  I should have just left it in the pot!  So I squeezed and pulled and pried the goop out with my fingers....it was a rather gross process as you can imagine.

Back it went into the pot, poured a bunch more boiling water onto it, stirred it up and simmered it till all was nicely blended, and this time let it sit in the POT overnight again.

Next morning it was the same deal - a slightly less solid, gelatinous lump.  I had to actually dump a bunch of it out in order to fit more boiling water into the pot.

By this point my family was having great fun poking  at Mommy's science experiment on the stove.  It looked like lemon custard.  They were pleased to be the first to check it out in the mornings and report back, "It's gotten all custard-y again, Mommy!"

Anyway, after a few days of this we woke up one morning to find that the soap had actually stayed in a liquid form.  It was rather like the muscousy consistency of snot (sorry - gross but true!).

I poured the whole gloopy mess of it into the container (and all over the counter as well!) and it sits under the sink waiting for it's first chance to fill a soap dispenser.

Would I make this homemade soap again?  I have to say the process itself was really simple.  Grate soap.  Melt in water with glycerin & essential oils if you wish.  Wait.  Try adding more water.  And so on.  (A rough guess would be 8 cups water/cup of soap flakes?)  Anyway, I'll have to give my final verdict after I actually get to try the soap in my dispenser.

On a simpler, soapy side note...want to know the best frugal liquid soap tip I have every received?  Buy a foaming soap (like Kandoo) and when it's used up just keep the container.  Refill with half water, half regular liquid soap & shake.  It's the special pump that makes it foamy, not the soap.  You use half the amount of soap, and it helps little ones with hand washing.
Kandoo Funny Berry Soap - 8.4 oz

Or there's nicer dispensers out there (wish I would have known that before I spent the money on that bright purple Kandoo bottle!)

Cuisipro Foam PumpRSVP Acrylic Foaming Soap PumpFoaming Liquid Soap Dispenser


Linking up to:
All Things Heart and Home
The Thrifty Home - Penny Pinching Party
Someday Crafts - Whatever Goes Wednesday

Sunday, March 27, 2011

Sunday Stew Special - Burritos 911!

For some reason, on Saturday night I completely forgot that I needed to pull together something to put in the crock pot for Sunday's lunch.  It was probably because I was just plain old tuckered out from our scary shed clean out from that afternoon or because my oldest girl was having a friend sleep over so we were enjoying a late night movie & candy fest.

I actually slept in later than I normally do on Sundays, and it wasn't until half an hour before I needed to leave for church that I remembered, "Ack!  Lunch!  I have nothing in the crockpot!"  It was tempting for a second to think, "Well, we'll just do fast food lunch out today", but I quickly shoved that thought aside and rose to the challenge of a last minute crock pot meal.

It also happened to be one of those days where you seem to be out of everything in the fridge, all at once, but I did see that we had ground beef and sour cream.  I thought perhaps I could do some sort of easy beef stroganoff, but that thought didn't really appeal to me.  Then I noticed the container of salsa, and so the idea of something sort of Mexican came to mind.  So here is my thrown-together-completely-last-minute-Sunday-Stew-Special which we decided to call...

"Burritos 911"

Brown 2 lbs ground beef with a couple teaspoons garlic powder
Dump into crock pot and stir in a tub of sour cream and about 2 cups chunky salsa.
Heat on low a few hours.
Have husband pick up some tortillas on the way home.
Serve with grated cheese (we had mozza).

OK, so maybe my burritos weren't as perfectly folded and garnished with cilantro....or is that parsley?

Anyway, here are the results from the BROWNLEE TEST KITCHEN...

4 year  old - I like the cheese.  Can I have more fishy crackers?  Moommmmmmmy....I want more fishy crackers!
Husband - it's good.  A little too juicy though.
12 yr old - I'm not really sure.  A little messy.
Donny (starving college student #1 who had polished off his first burrito before I even had a chance to glance at mine) - It's nice and juicy.  And it's cool 'cause all the food is already all mixed together.  You don't need to make other dishes dirty. (which I heartily agreed with - oh, the wonders of a crockpot!).
10 yr old - I like it.  It's very juicy and a little spicy.  You should forget to make stew more often.
James - ( starving college student #2)  I like it.  It's even better with cheese. Everything is better with cheese!
The Cook - I'm just glad I was able to throw something together last minute.  And I like it better than the Irish Stew we had last week!

So there you have it, not quite a stew, but the Crock Pot still saves the day.

Saturday, March 26, 2011

Daily Declutter Challenge #41 - The Little Shed of Horrors

We're very thankful for our home and we love our neighborhood and large backyard. One drawback though is that we don't have a garage or basement....but we do have a shed!  A tiny, dark, spider infested shed, but at least it keeps stuff out of the rain.  It's filled with painting supplies, garden tools, the lawn mower, ladder, and many other things we didn't even know we had.

Today we made it a project for the whole family, much to our children's horror.  NOBODY likes to go into that shed!

Can you blame us?

We decided to were going to pull EVERYTHING out, so we formed an assembly line and my brave husband went in there to pass items out.  He killed at least 5 REALLY BIG spiders.  We grow em big out here.

We placed everything onto the patio and decided what we should keep and what we could toss and what we could put in the garage sale pile.

Hard to believe that all fit in the shed.  It looks like a hoarder's backyard!


After it was emptied out I went in with a broom and a face mask.  (I'm not kidding - I didn't want to be breathing in whatever crap was in there.)  I pulled my hoodie on my head really tightly so I wouldn't get spiders in my hair.  I'm sure I killed at least 10 while I was in there.  *shudder*  And I really hate spiders.


After giving it a thorough sweeping out, I  sprayed the corners and walls with a homemade spider repellent of vinegar, eucalyptus oil, and peppermint oil.  I have no idea if this will work, but it made me feel a little better about being in there.  Now our shed smells all minty fresh!

After it was de-cobwebbed we put the large, not very frequently used items in first.  We put a bunch of nails up to hang things within easy reach on the walls.

  My hubby also put up some scrap pieces of wood as mini shelves to place narrow items.
 

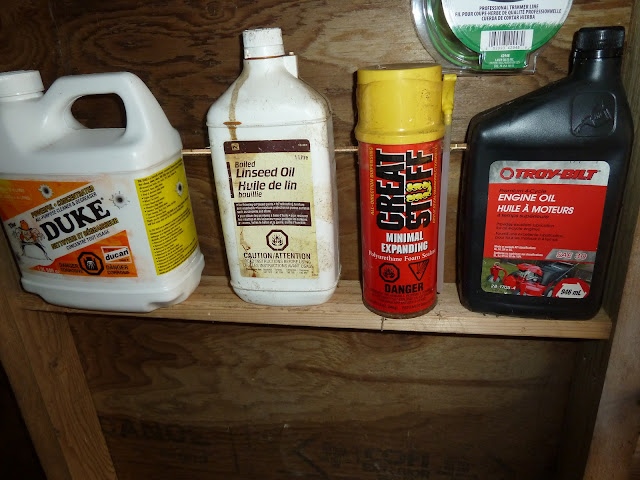
We didn't have enough wall space for those fancy rake holder clamps, plus we didn't feel like a trip to Home Depot. Instead my handy husband just took a piece of scrap wood and nailed it across a corner and put all our brooms, shovels, rakes etc behind it.  Simple and free fix!


Mostly we just got rid of stuff though.  We put it all back nice and neat and here's the end of three hours of hard work.
Now we can actually get the lawn mower out without wrestling junk out of the way.  And you can't tell from the photos, but it's waaaay less cobwebby and creepy.

So to recap How to Organize a Shed that you haven't dealt with since the birth of your third child almost 5 years ago.....

1.  Pull EVERYTHING out.
2.  Get rid of junk you don't need or use.  Recycle if you can!
3.  Sweep it out - wearing a mask and hoodie will help!
4.  Put up nails for hanging, scrap wood for more shelves.
5.  Put it all back, nice and neat.
6.  Hug your husband and make him feel appreciated!  His love language is probably physical touch.   Mine is acts of service.  :-)  So I'm a very happy wife today!

Friday, March 25, 2011

Daily Declutter Challenge #39 & #40 - Daily Double

My declutters are getting easier and easier - I managed to get two done today.  So here's a Daily Double!

My bedside table is mostly home to various yummy scented moisturizers, a prayer journal, and assorted tossed in items including a couple bookmarks.  I still haven't trained myself to use bookmarks though!

I had so many containers of half used lotions that were just tossed in there any which way.  I decided to keep them all, but mix them up together into just a couple containers.  It ended up smelling pretty yummy!  Less is more in this case.


Simple and functional - I like to sit on the edge of my bed and put lotion on before my socks, so it's better to keep all this stuff here rather than in my bathroom.

Now onto the bathroom!

I really can't believe I'm showing you this cabinet.  Eeek!  Transparency is very motivating!
 

If you're anything like me, most of the stuff under your cabinet gets forgotten about and barely used.  My daily stuff is on my open shelf and my makeup fits in a little bag on the counter.  I don't wear a lot of make up and I've gotten better at streamlining my products.  By the time you're in your late 30's you don't need 28 shades of eyeshadow and 14 lip colours.  At least I don't.  :-)

I even went through my big bag of nail polish and tossed all the ones that were getting gummy.  I'm sure some of them were over 10 years old!

I also collected up all the little bars of soap that we got from hotel rooms or other people had given to us (and we never use since we always have liquid hand soap!) and put them aside for another purpose.  I'll post on that tomorrow.....

Everything else went into baskets and containers and here is the end result!
 
If you're overwhelmed with all the stuff cluttering up your bathroom, here are some strategies I've learned over the years.

1.  Only keep on the counter items you use multiple times a day - soap, toothbrushes, maybe hairbrushes etc in storage tumblers or jars.

This multi-purpose storage tumbler is made from recycled glass.  Cool!
Recycled Glass Toothbrush Holder

This is a good idea- keep the toothbrushes mounted on the wall or in the medicine cabinet.
Hang Away Universal Toothbrush Holder (GID STYLE) with 3M Tape Backing 100% USA. Other styles available from SB Products Store Front on Amazon. To see more product pictures click here...


Here's a little something for the germ-a-phobe!
iTouchless UV Toothbrush Holder/Sanitizer
I loooove the style of this one!
America Retold Chemist Ivory Ceramic Toothbrush Holder

Anyway, I'm getting sidetracked - onto tip two!

2.  Keep in the medicine cabinet, drawers, or shelf items you use once a day - makeup, hair products, deodorants.  If you have a teeny bathroom like mine, an over the toilet cabinet  or shelf is a great space saver.
Ameriwood Bathroom Wall Cabinet in EspressoZenith 982CH Space Saver, Modern ClassicZenith Products 9107W Country Cottage Etagere Over-the-Toilet Shelving System, WhiteNassau Louvered Door SpacesaverWhite Finish Wood Commode With Storage Shelves And Glass Doors For Cupboard On TopBamboo Space Saver Cabinet in NaturalFieldcrest Wall Cabinet - White

3.  Keep under the sink or lower storage items you only use occasionally.  Pedastal sinks are obviously no good for this.  Who ever brought back pedastal sinks into fashion anyway?  I always wonder where do people put their stuff?

4.  Never use an item?  Toss it!!!!

This day was pretty easy....but I still have to face my bedroom closet.....